The Browser Recorder — tab, window, screen, mic
Chapter 3: The Browser Recorder — tab, window, screen, mic
The recorder lives at app.seameet.ai/record. Open the page and you are two clicks away from a live recording. This chapter is the map of every knob and every source.
The launchpad — two choices, not five
Old versions of the recorder had five look-alike tiles that were hard to tell apart. The current launchpad reduces it to two choices, each with a big icon and a one-line summary:
- Just me. Your microphone, and optionally your webcam. For dictation, personal notes, and talking-head recordings.
- A call or meeting. A browser tab, an app window, or your whole screen — plus the other people's audio via Chrome's system-audio capture.
Pick one, and the flow that follows is scoped to that choice. This is what the launchpad is optimised for: figuring out what you want to record without paralysing you with a five-tile menu.
The "Record & transcribe" button
Red, with a record glyph. When you click it, one of two things happens:
- Just me: you go straight to the recorder with your mic (and camera if you chose one). No further picker.
- A call or meeting: Chrome opens its native share picker so you can pick the tab / window / screen. See below.
There is also an opt-out for transcription — a default-on "start live transcription" checkbox. Guests who prefer to record audio/video without a live transcript can uncheck it and still get a normal recording (the post-processed transcript still runs on Sync Pro accounts).
Chrome's share picker — the animated walkthrough
For anyone recording a tab, window, or screen for the first time, Chrome's share picker looks intimidating. The per-app record pages include an animated walkthrough of the picker that:
- Shows which tab or window to pick for that specific app.
- Reminds you to keep "Share system audio" on — without it, the other participants' voices are not recorded.
Grant the picker's permission dialog and the recording starts.
The source options in detail
Chrome tab. The current tab, another open tab, or a tab you'll open next. The tab-audio API captures everything the tab plays, so meeting audio, YouTube, podcasts, and Spotify all record cleanly.
Application window. A specific desktop app's window (Zoom, Teams, Slack, VS Code, anything). System audio comes only from the app you pick, so the recording is scoped to that window's sound.
Entire screen. Every visible window plus all system sound. Broadest capture; also the noisiest — pick this only when you know you want everything.
Microphone. Your voice, no system audio. The "Just me" path picks this by default.
Any of the visual sources can be combined with your microphone (a checkbox in the recorder) and your webcam as a draggable picture-in-picture overlay.
The webcam PiP
Enable the camera before you click Record and a small draggable webcam window appears on top of whatever you're recording. It's recorded into the final file — the resulting video shows your face on top of the meeting or tab. Useful for talking-head recordings, tutorials, and any recording where the visual identity of the speaker matters.
Anonymous vs signed-in
Anonymous (never signed in on this device):
- Chrome opens the picker, recording starts.
- On Stop, the Anon-Stop modal offers: sign in and upload, download the audio, or discard.
- Free-tier reveal caps apply.
Signed-in:
- Recording uploads to your library automatically on Stop.
- Live transcript flows into the library page.
- If you're free-tier, the 15-minute reveal cap on transcript still applies (visible in playback, not during recording).
The desktop entry point is the same URL; the account state decides the flow.
The floating recording pill
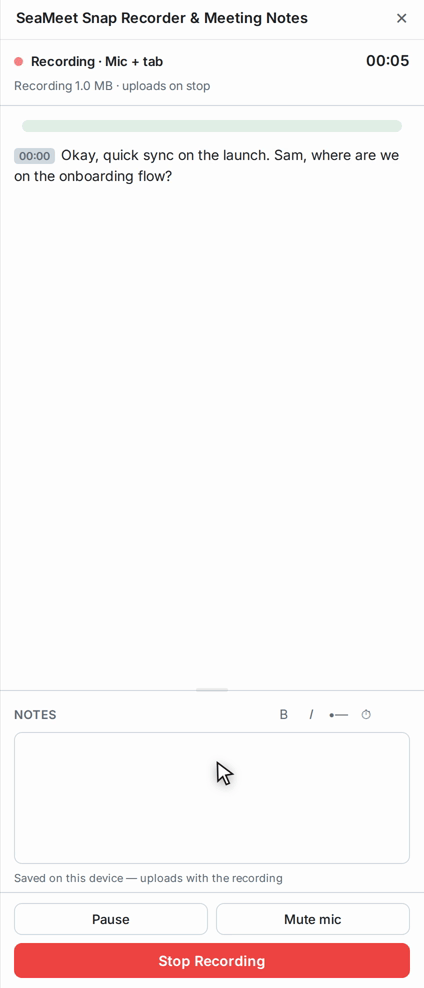
Once recording starts, a small floating pill appears in a corner of the browser showing elapsed time, a Pause button, and a Stop button. It stays on top of every tab you switch to, so you can navigate away from the recording page and come back later without losing control. See the Live Captions and Live Notes chapter for what the main recording page shows.
Where to enter the recorder from
- Direct URL:
app.seameet.ai/record - A specific app:
app.seameet.ai/record/<app>— see Chapter 4 - Header "New recording" button — from anywhere in the app, this jumps straight to the recorder (as of v1.16).
- The home page — if you're signed out, the home page IS the launchpad. If you're signed in, click "New recording".
Browser support
Best on Chrome, Edge, and other Chromium-based browsers — Chrome's tab-capture API is the most complete implementation.
Firefox and Safari can record window / screen / mic, but tab-audio capture is limited or unavailable. The web app detects this and shows a "browser gate" page suggesting Chrome for the fullest experience.
Common problems
"Chrome's share picker says 'Cannot share this tab'." Some sites (DRM-protected video, some banks) block tab-capture. Try recording the tab from the picker's "Tab" list rather than "This tab", or record the window instead.
"The recording has no audio from the meeting, only my voice." You forgot to check Share system audio in Chrome's picker. Stop, restart, and check the box.
"I can't hear my own voice in the playback but the other people are there." Your mic wasn't captured. Make sure the mic toggle in the recorder was on before you clicked Record.
"The recording is choppy on Firefox / Safari." Use Chrome. Other browsers have working recording but the pipeline is far less tested.
Quick Reference
| Task | How |
|---|---|
| Just me: mic + optional camera | Launchpad → Just me → Record & transcribe |
| A call: tab, window, or screen + system audio + mic | Launchpad → A call or meeting → Record & transcribe → pick source in Chrome |
| Record without a live transcript | Uncheck "start live transcription" before recording |
| Add webcam PiP | Enable camera toggle before Record |
| Stop | Red button in the floating pill, or on the recording page |
| Pause / Resume | Pause button in the floating pill or the recording page |
Last updated: 2026-08-28
← Chapter 2: Signing In | Chapter 4: The Per-App Record Pages →
Published: